Deploying a Text-to-Vector Embedding Converter to Azure with Terraform and GitHub Actions
Integrating Azure AI Services into Your DevOps Workflow
You can find the GitHub repository for this project here.
Introduction
What is a Text-to-Vector Embedding Converter ?
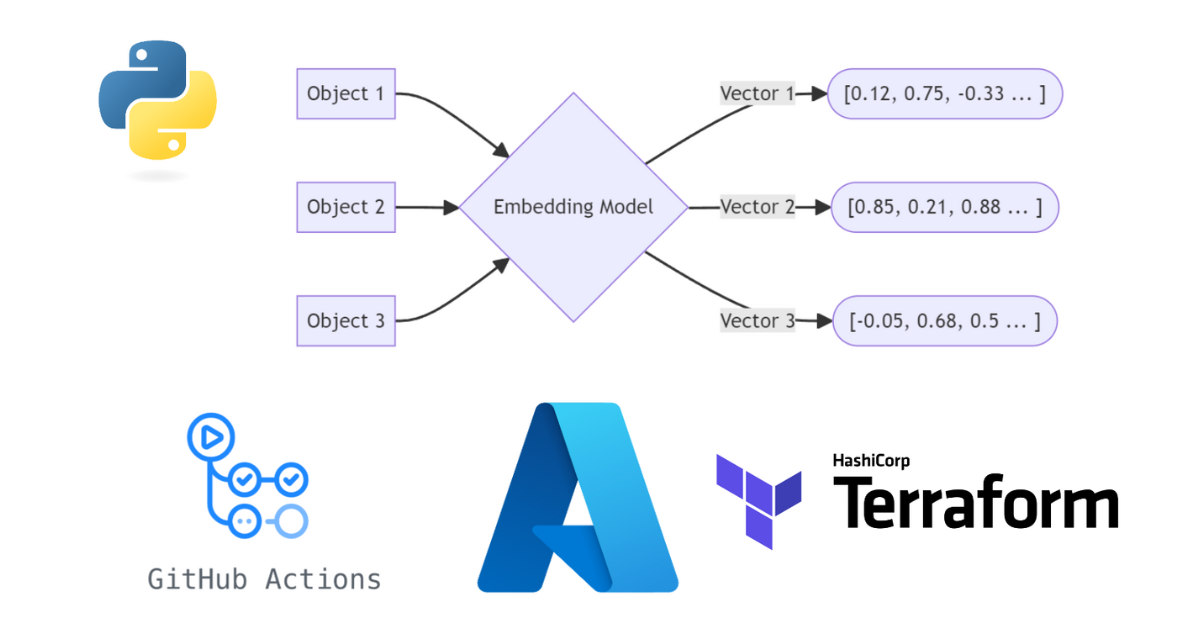
A Text-to-Vector Embedding Converter is a tool that transforms textual data into numerical representations, commonly referred to as embeddings. These embeddings capture the semantic meaning of the text and are widely used in machine learning applications like search engines, recommendation systems, and natural language processing (NLP) tasks.
For example, it can find similarities between words or sentences by comparing their embeddings. Similar sentences generate embeddings that are numerically close, making it easier to analyze and retrieve the best results programmatically.
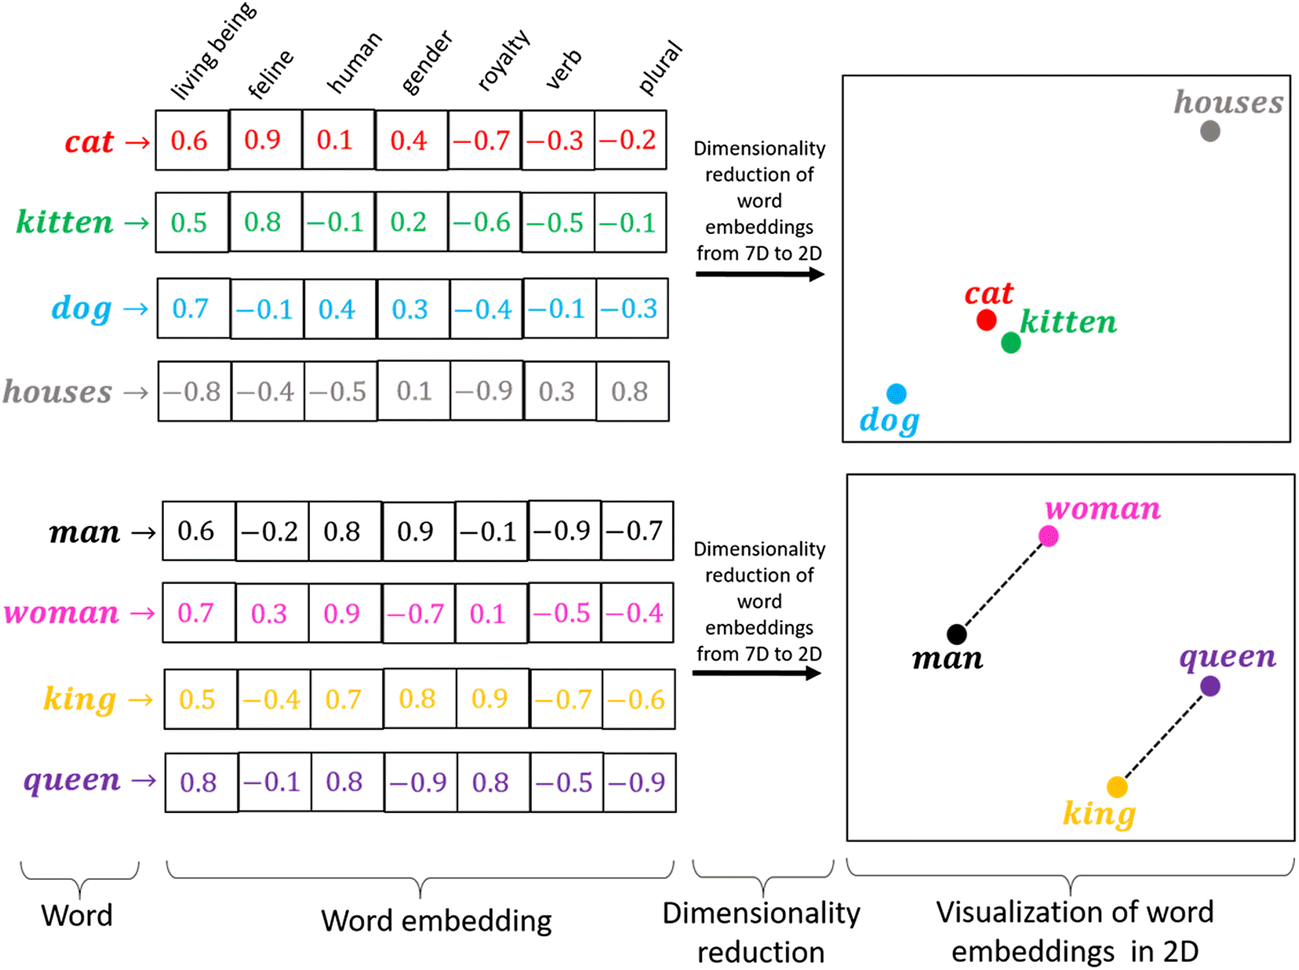 Word Embedding (source)
What is the goal of this project ?
The goal of this project is to deploy a simple Python-based Text-to-Vector Embedding Converter on Azure, utilizing the text-embedding-ada-002 model available on Azure AI Services. This includes:
- Automating the creation of Azure resources using Terraform
- Managing infrastructure state with Terraform Cloud
- Setting up GitHub Actions for automated CI/CD deployment
Prerequisite
- Accounts needed:
- Azure account with an existing subscription ($)
- Terraform Cloud account (free)
- GitHub account (free)
- Credentials needed:
- Azure Service Principal (Tenant ID, Client ID, Client Secret, Subscription ID)
- Terraform Cloud Token
- Tools Installed:
- Terraform
- Python and the some librairies (look the requirements.txt)
- Basic Knowledge:
- Terraform basics
- Github Actions workflows
Step 1: Build Your Python App
View of the app structure
1
2
3
4
5
6
text2vector-azure-ai
├── webapp
│   ├── requirements.txt
│   ├── app.py
│   ├── index.html
└── .gitignore
The project is organized into a main directory called text2vector-azure-ai. Inside, there’s a webapp folder containing the core components of the application:
requirements.txtlists the Python dependenciesapp.pyis the main Python script that runs the applicationindex.htmlserves as the web interface The root directory also includes a .gitignore file to specify files and directories that Git should ignore like .env and tfstate files
Dependencies
1
2
3
4
openai
flask
python-dotenv
gunicorn
The Python dependencies needed for the project:
openai: Used to interact with the Azure OpenAI API for generating text embeddingsflask: A lightweight web framework to build and serve the applicationpython-dotenv: Manages environment variables securely from a .env filegunicorn: A production-ready WSGI server for running the Flask application
Description of the Python app
app.py
This Python code implements a Flask web app that uses Azure OpenAI services to convert text to vector embeddings.
1
2
3
4
5
6
7
8
9
10
11
12
13
14
15
16
17
18
19
20
21
22
23
24
25
26
27
28
29
30
31
32
33
34
35
36
37
38
39
40
41
42
import os
from flask import Flask, request, jsonify, send_from_directory
from openai import AzureOpenAI
from dotenv import load_dotenv

load_dotenv()

app = Flask(__name__)

api_key = os.getenv("AZURE_OPENAI_API_KEY")
endpoint = os.getenv("AZURE_OPENAI_ENDPOINT")
deployment_id = os.getenv("AZURE_OPENAI_DEPLOYMENT_ID")

client = AzureOpenAI(
    api_key=api_key,
    api_version="2023-05-15",
    azure_endpoint=endpoint
)

@app.route('/')
def index():
    return send_from_directory('.', 'index.html')

@app.route('/embed', methods=['POST'])
def embed():
    data = request.json
    user_input = data.get('text')

    if not user_input:
        return jsonify({"error": "No text provided"}), 400

    response = client.embeddings.create(
        input=user_input,
        model=deployment_id  # Use deployment_id as model
    )

    embedding = response.data[0].embedding

    return jsonify({"embedding": embedding})

if __name__ == '__main__':
    app.run(debug=True)
Here’s what it does:
Environment Setup: Loads API credentials (key, endpoint, deployment ID) from a .env file for secure configuration. Since we are going to use App Service on Azure, we will store the credentials in the environment variables section. The key, endpoint, and deployment ID will be created when we will deploy the Azure Cognitive Services.Azure OpenAI Client: Initializes a client to interact with the Azure OpenAI API. You can find from the Microsoft Learn documentation how to use the Azure OpenAI endpoint with Python here.Routes:/: Serves the main index.html file./embed: Accepts a JSON payload with text, generates its embedding using Azure OpenAI, and returns it in JSON format.
Execution: Runs the app locally in debug mode for development purposes.
index.html
This index.html file provides a simple web interface for the Text-to-Vector Embedding Converter.
1
2
3
4
5
6
7
8
9
10
11
12
13
14
15
16
17
18
19
20
21
22
23
24
25
26
27
28
29
30
31
32
33
34
35
36
37
38
39
<!DOCTYPE html>
<html lang="en">
  <head>
    <meta charset="UTF-8" />
    <meta name="viewport" content="width=device-width, initial-scale=1.0" />
    <title>Text to Vector Embedding Converter</title>
  </head>
  <body>
    <h1>Text to Vector Embedding Converter</h1>
    <form id="embeddingForm">
      <label for="text">Enter text:</label>
      <input type="text" id="text" name="text" required />
      <button type="submit">Get Embedding</button>
    </form>
    <pre id="result"></pre>

    <script>
      document
        .getElementById("embeddingForm")
        .addEventListener("submit", async function (event) {
          event.preventDefault();
          const text = document.getElementById("text").value;
          const response = await fetch("/embed", {
            method: "POST",
            headers: {
              "Content-Type": "application/json",
            },
            body: JSON.stringify({ text }),
          });
          const result = await response.json();
          document.getElementById("result").textContent = JSON.stringify(
            result,
            null,
            2
          );
        });
    </script>
  </body>
</html>
Here’s a brief breakdown:
Page Content:- A form lets users enter text and click a button to get its embedding.
- Results are shown below the form.
JavaScript Functionality:- Sends the text to the /embed endpoint.
- Displays the embedding result in a readable format on the page.
Step 2: Setting Up the Infrastructure with Terraform
View of the app structure
1
2
3
4
5
6
7
8
9
10
text2vector-azure-ai
├── webapp
│   ├── app.py
│   ├── requirements.txt
│   ├── index.html
├── .gitignore
├── main.tf
├── providers.tf
├── variables.tf
└── outputs.tf
To deploy the application to Azure, we need to define the infrastructure, and for this, we use Terraform. The following Terraform configuration files are included:
main.tfDefines the primary infrastructure resources, such as Azure Cognitive Services and Resource group, which are needed to deploy the Text-to-Vector Embedding Converter.providers.tfConfigures the Azure provider, setting up credentials and region details to enable Terraform to manage the resources in Azure.variables.tfContains variables for the project, such as resource names and regions, which can be customized during deployment.outputs.tfSpecifies output values, like URLs or endpoints, which can be used to access the deployed resources.
Azure Resources needed
To deploy the necessary infrastructure on Azure using Terraform, we focus on the following resources:
Resource Group: This will organize all the resources in Azure.Cognitive Services Account: Terraform will deploy this account to enable access to Azure AI services.Cognitive Deployment: The specific deployment for the text-embedding model will be created using Terraform to ensure it is available for the application.
In this project, the App Service will not be deployed using Terraform. Instead, it will be created and configured directly in the Azure portal.
Terraform Configuration
main.tf
This main.tf file handles the creation and configuration of all Azure resources necessary for the AI-powered functionality of the application.
1
2
3
4
5
6
7
8
9
10
11
12
13
14
15
16
17
18
19
20
21
22
23
24
25
26
resource "azurerm_resource_group" "example" {
  name     = var.resource_group_name
  location = var.location
}

resource "azurerm_cognitive_account" "example" {
  name                = var.cognitive_account_name
  location            = azurerm_resource_group.example.location
  resource_group_name = azurerm_resource_group.example.name
  kind                = "OpenAI"
  sku_name            = "S0"
}

resource "azurerm_cognitive_deployment" "example" {
  name                 = var.deployment_name
  cognitive_account_id = azurerm_cognitive_account.example.id
  model {
    format  = "OpenAI"
    name    = "text-embedding-ada-002"
    version = "2"
  }

  scale {
    type = "Standard"
  }
}
Resource Group: Defines a resource group in Azure, specified by the name and location variables, to logically group all related resources.Cognitive Services Account: Provisions a Cognitive Services account with the “OpenAI” kind, using the “S0” SKU for basic tier access to Azure AI services.Cognitive Deployment: Deploys the text-embedding-ada-002 model, part of the Cognitive Services account, with standard scaling configured for AI processing. (You can choose a different embedding model available in the Azure AI Service)
providers.tf
This providers.tf file configures the necessary Terraform provider and sets up the environment for managing Azure resources.
1
2
3
4
5
6
7
8
9
10
11
12
13
14
15
16
17
18
19
terraform {
  required_version = ">= 1.1.0"
  required_providers {
    azurerm = {
      source = "hashicorp/azurerm"
      version = "~> 3.0"
    }
  }
  cloud {
    organization = "og-sofianlak" # Replace with your organization name
    workspaces {
      name = "tf-cloud-sofianlak" # Replace with your workspace name
    }
  }
}

provider "azurerm" {
  features {}
}
Terraform Version and Providers: Specifies the required Terraform version (1.1.0 or higher) and configures the Azure provider (azurerm), ensuring compatibility with version 3.0 or higher.Cloud Configuration: Configures Terraform Cloud with the organization (og-sofianlak) and workspace (tf-cloud-sofianlak) settings. This ensures secure storage of the tfstate file, which tracks the infrastructure’s current state.Azure Provider: Configures the Azure provider to manage resources on Azure. The features block is left empty, which is typical for basic setups, enabling Terraform to interact with Azure resources as specified.
variables.tf
This variables.tf file defines the input variables for the Terraform configuration:
1
2
3
4
5
6
7
8
9
10
11
12
13
14
15
variable "resource_group_name" {
  default = "rg-sofianlak-test" # Replace with your resource group name
}

variable "location" {
  default = "West Europe" # Replace with your location
}

variable "cognitive_account_name" {
  default = "ai-sofianlak" # Replace with your cognitive account name
}

variable "deployment_name" {
  default = "ai-deployment-sofianlak" # Replace with your deployment name
}
resource_group_name: Name of the Azure resource group.location: Azure region for resource deployment.cognitive_account_name: Name of the Cognitive Services account.deployment_name: Name of the Cognitive Services deployment.
outputs.tf
This outputs.tf file defines the outputs for the Terraform configuration:
1
2
3
4
5
6
7
output "cognitive_account_id" {
  value = azurerm_cognitive_account.example.id
}

output "cognitive_deployment_id" {
  value = azurerm_cognitive_deployment.example.id
}
cognitive_account_id: Outputs the ID of the Cognitive Services account created.cognitive_deployment_id: Outputs the ID of the Cognitive Services deployment.
These outputs provide useful information about the deployed resources, which can be used in other Terraform configurations or for reference.
Configure Terraform Cloud
We need Terraform Cloud to securely store the tfstate file in the cloud during the deployment phase.
To set this up, follow these steps:
Create a Terraform Cloud Account: Sign up at Terraform Cloud.Create an Organization and Workspace:- Once logged in, create an organization (e.g., “og-sofianlak”) and a workspace (e.g., “tf-cloud-sofianlak”) for managing your infrastructure.
- Choose the CLI-Driven Workflow
Generate an API Token:- Go to “User Settings” > “Tokens” in Terraform Cloud and generate a personal API token. Keep this token, as we are going to store it in the Github Secrets later on.
Configure Terraform to Use Terraform Cloud:- In your providers.tf, configure the cloud provider as we did here
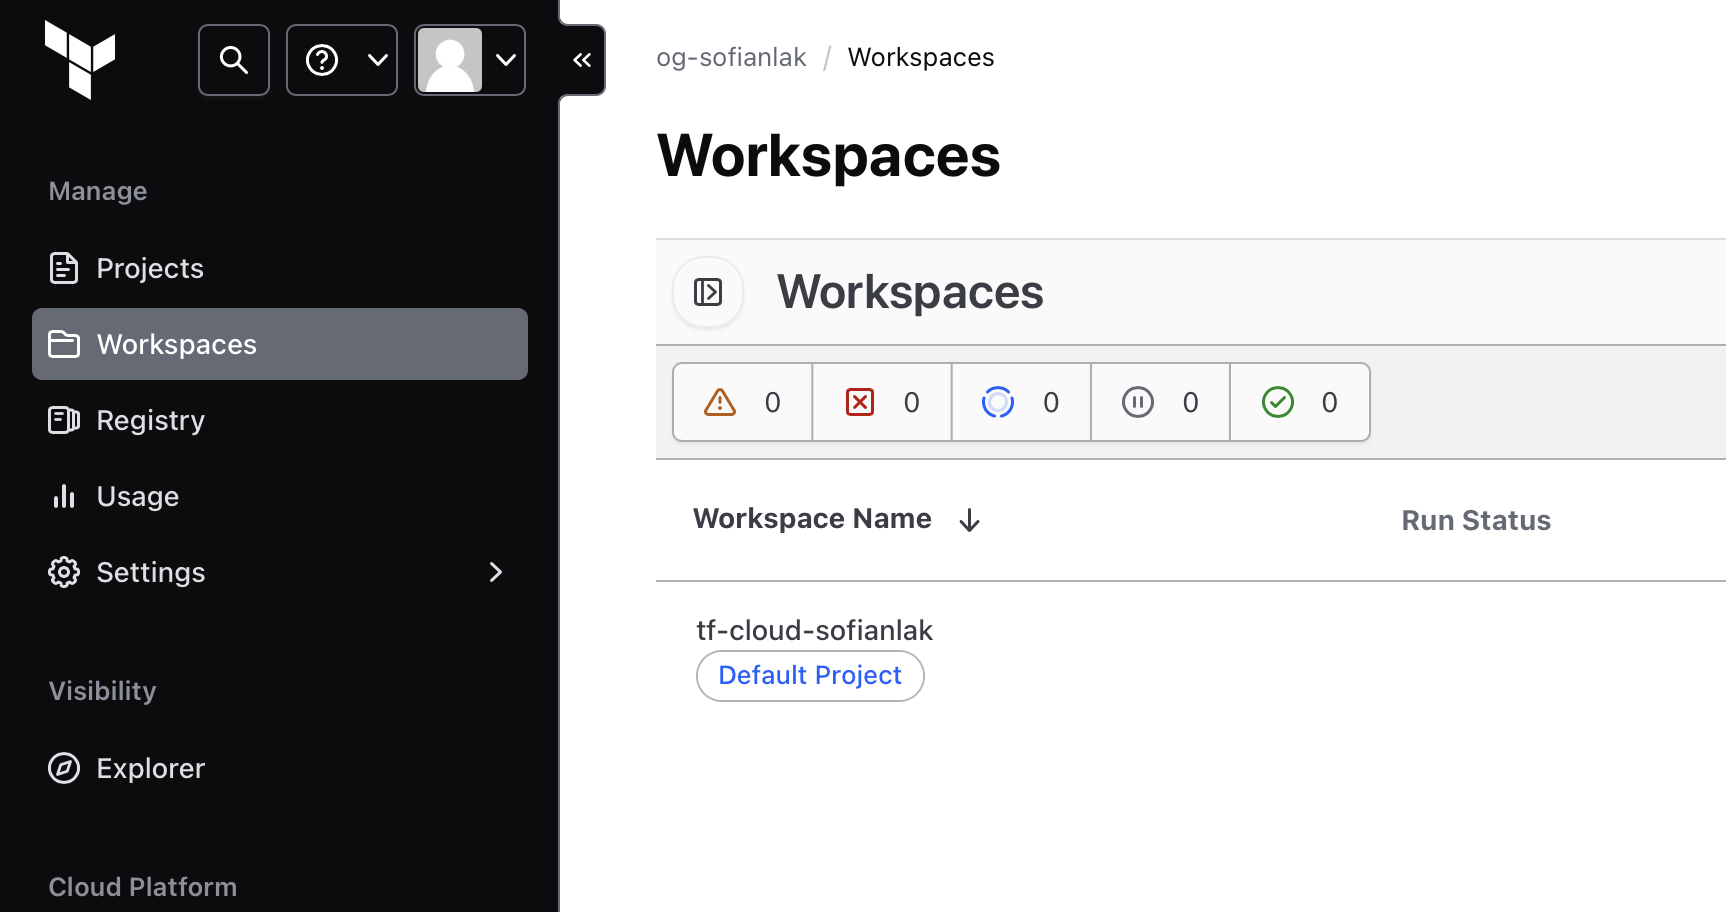 Terraform organization and workspace ready for deployment
Step 3: Deploying the Application Using GitHub Actions
View of the app structure
1
2
3
4
5
6
7
8
9
10
11
12
13
text2vector-azure-ai
├── webapp/
│   ├── app.py
│   ├── requirements.txt
│   └── index.html
├── .gitignore
├── main.tf
├── providers.tf
├── variables.tf
├── outputs.tf
├── .github/
│   └── workflows/
└       └── deploy.yml
As our code is in GitHub, we will use GitHub Actions, a tool integrated into GitHub that automates tasks like building, testing, and deploying code. It’s an ideal choice for CI/CD because it works directly within GitHub, is simple to set up, and provides the flexibility to automate a variety of tasks.
The .github/ folder contains the workflow definition for GitHub Actions:
deploy.yml: This file defines the steps for deploying the application using CI/CD. It automates tasks like checking out the code, setting up Terraform, and deploying to Azure.
Setting Up GitHub Actions
Workflow File Breakdown
This workflow automates both the infrastructure setup (via Terraform) and the application deployment to Azure.
Please check the variable name used in this file here.
1
2
3
4
5
6
7
8
9
10
11
12
13
14
15
16
17
18
19
20
21
22
23
24
25
26
27
28
29
30
31
32
33
34
35
36
37
38
39
40
41
42
43
44
45
46
47
48
49
50
51
52
53
54
55
56
name: Terraform & App Deployment

on:
  push:
    branches:
      - main

jobs:
  terraform:
    name: "Terraform"
    runs-on: ubuntu-latest
    env:
      ARM_CLIENT_ID: $
      ARM_CLIENT_SECRET: $
      ARM_SUBSCRIPTION_ID: $
      ARM_TENANT_ID: $
      TF_TOKEN_app_terraform_io: $
      RESOURCE_GROUP_NAME: $
      COGNITIVE_ACCOUNT_NAME: $
      COGNITIVE_DEPLOYMENT_NAME: $

    steps:
      - name: Checkout repository
        uses: actions/checkout@v3

      - name: Setup Terraform
        uses: hashicorp/setup-terraform@v3
        with:
          terraform_version: ">=1.1.0"

      - name: Terraform Init
        run: terraform init

      - name: Terraform Plan
        run: terraform plan

      - name: Terraform Apply
        run: terraform apply -auto-approve

  deploy:
    name: "Deploy to Azure Web App"
    runs-on: ubuntu-latest
    needs: terraform
    env:
      WEB_APP_NAME: $

    steps:
      - name: Checkout repository
        uses: actions/checkout@v3

      - name: Deploy to Azure Web App
        uses: azure/webapps-deploy@v3
        with:
          app-name: $
          publish-profile: $
          package: ./webapp
Here’s a breakdown of the deploy.yml GitHub Actions workflow:
- Terraform Job:
Trigger: Runs when there’s a push to the main branch.Steps:Checkout: Retrieves the code from the GitHub repository.Setup Terraform: Installs Terraform with version >=1.1.0.Terraform Init: Prepares the Terraform environment.Terraform Plan: Checks the infrastructure changes before applying.Terraform Apply: Applies the changes to Azure, provisioning the resources.
- Deploy Job:
Trigger: Runs after the Terraform job is successful.Steps:Checkout: Retrieves the code again.Deploy to Azure: Deploys the web app to Azure Web App using the Azure publish profile.
Secrets Management
For securely managing credentials in both GitHub Secrets and Terraform Cloud during the deployment process, follow best practices that ensure sensitive information is not exposed in the codebase.
GitHub Secrets and Variables
GitHub provides a secure way to store sensitive credentials using GitHub Secrets. These secrets are encrypted and are only accessible to workflows within the repository.
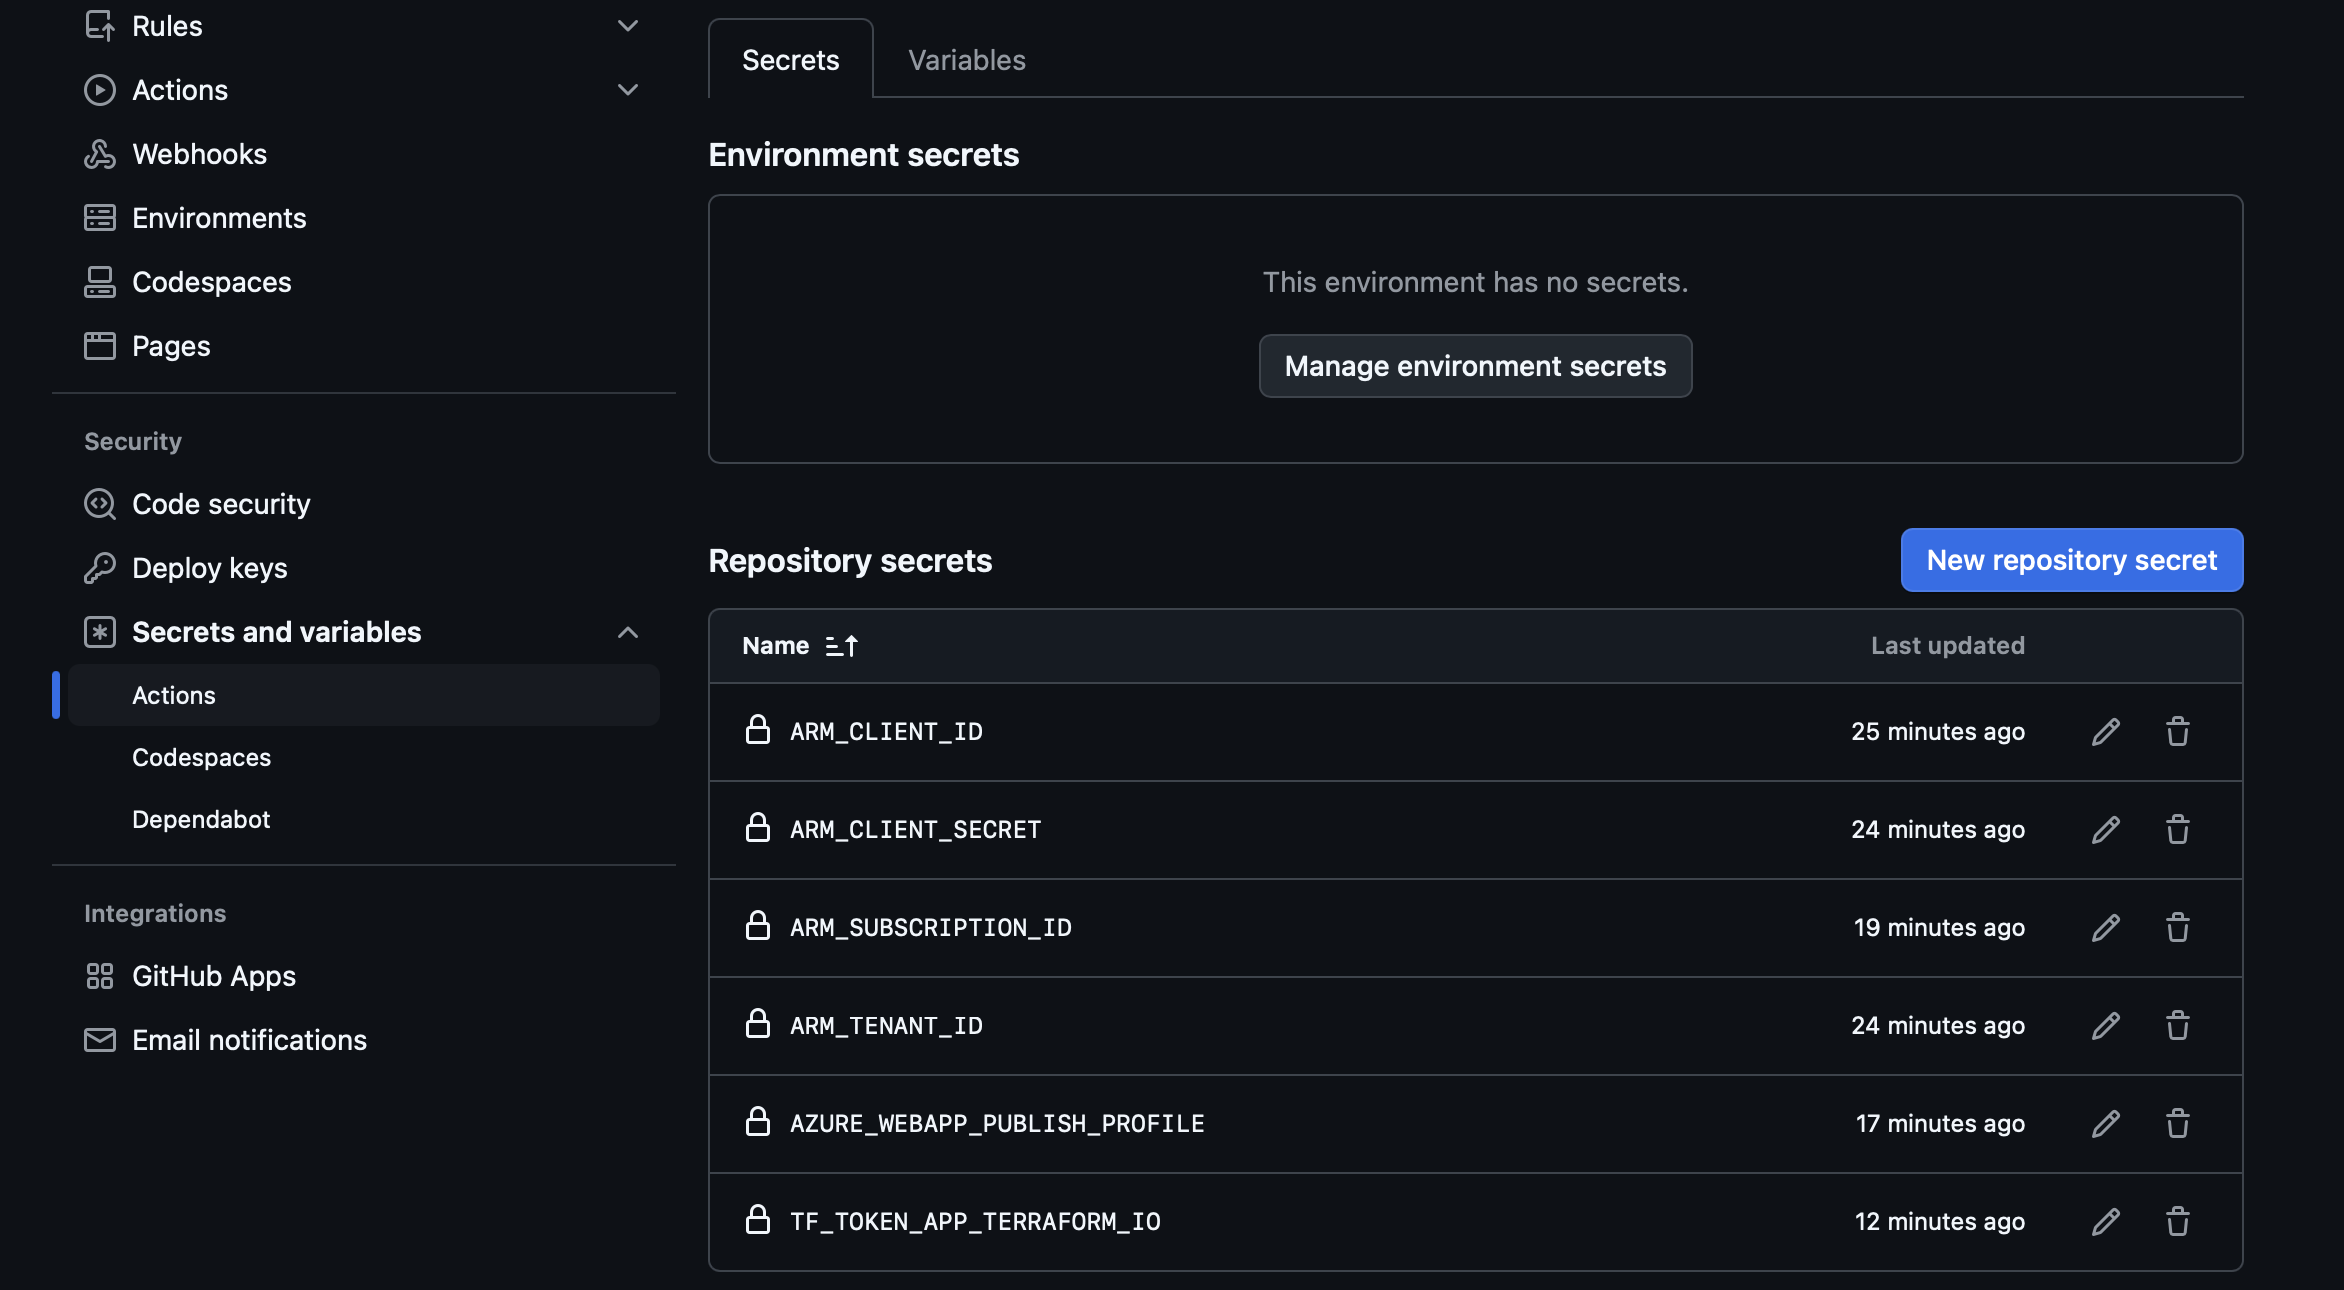
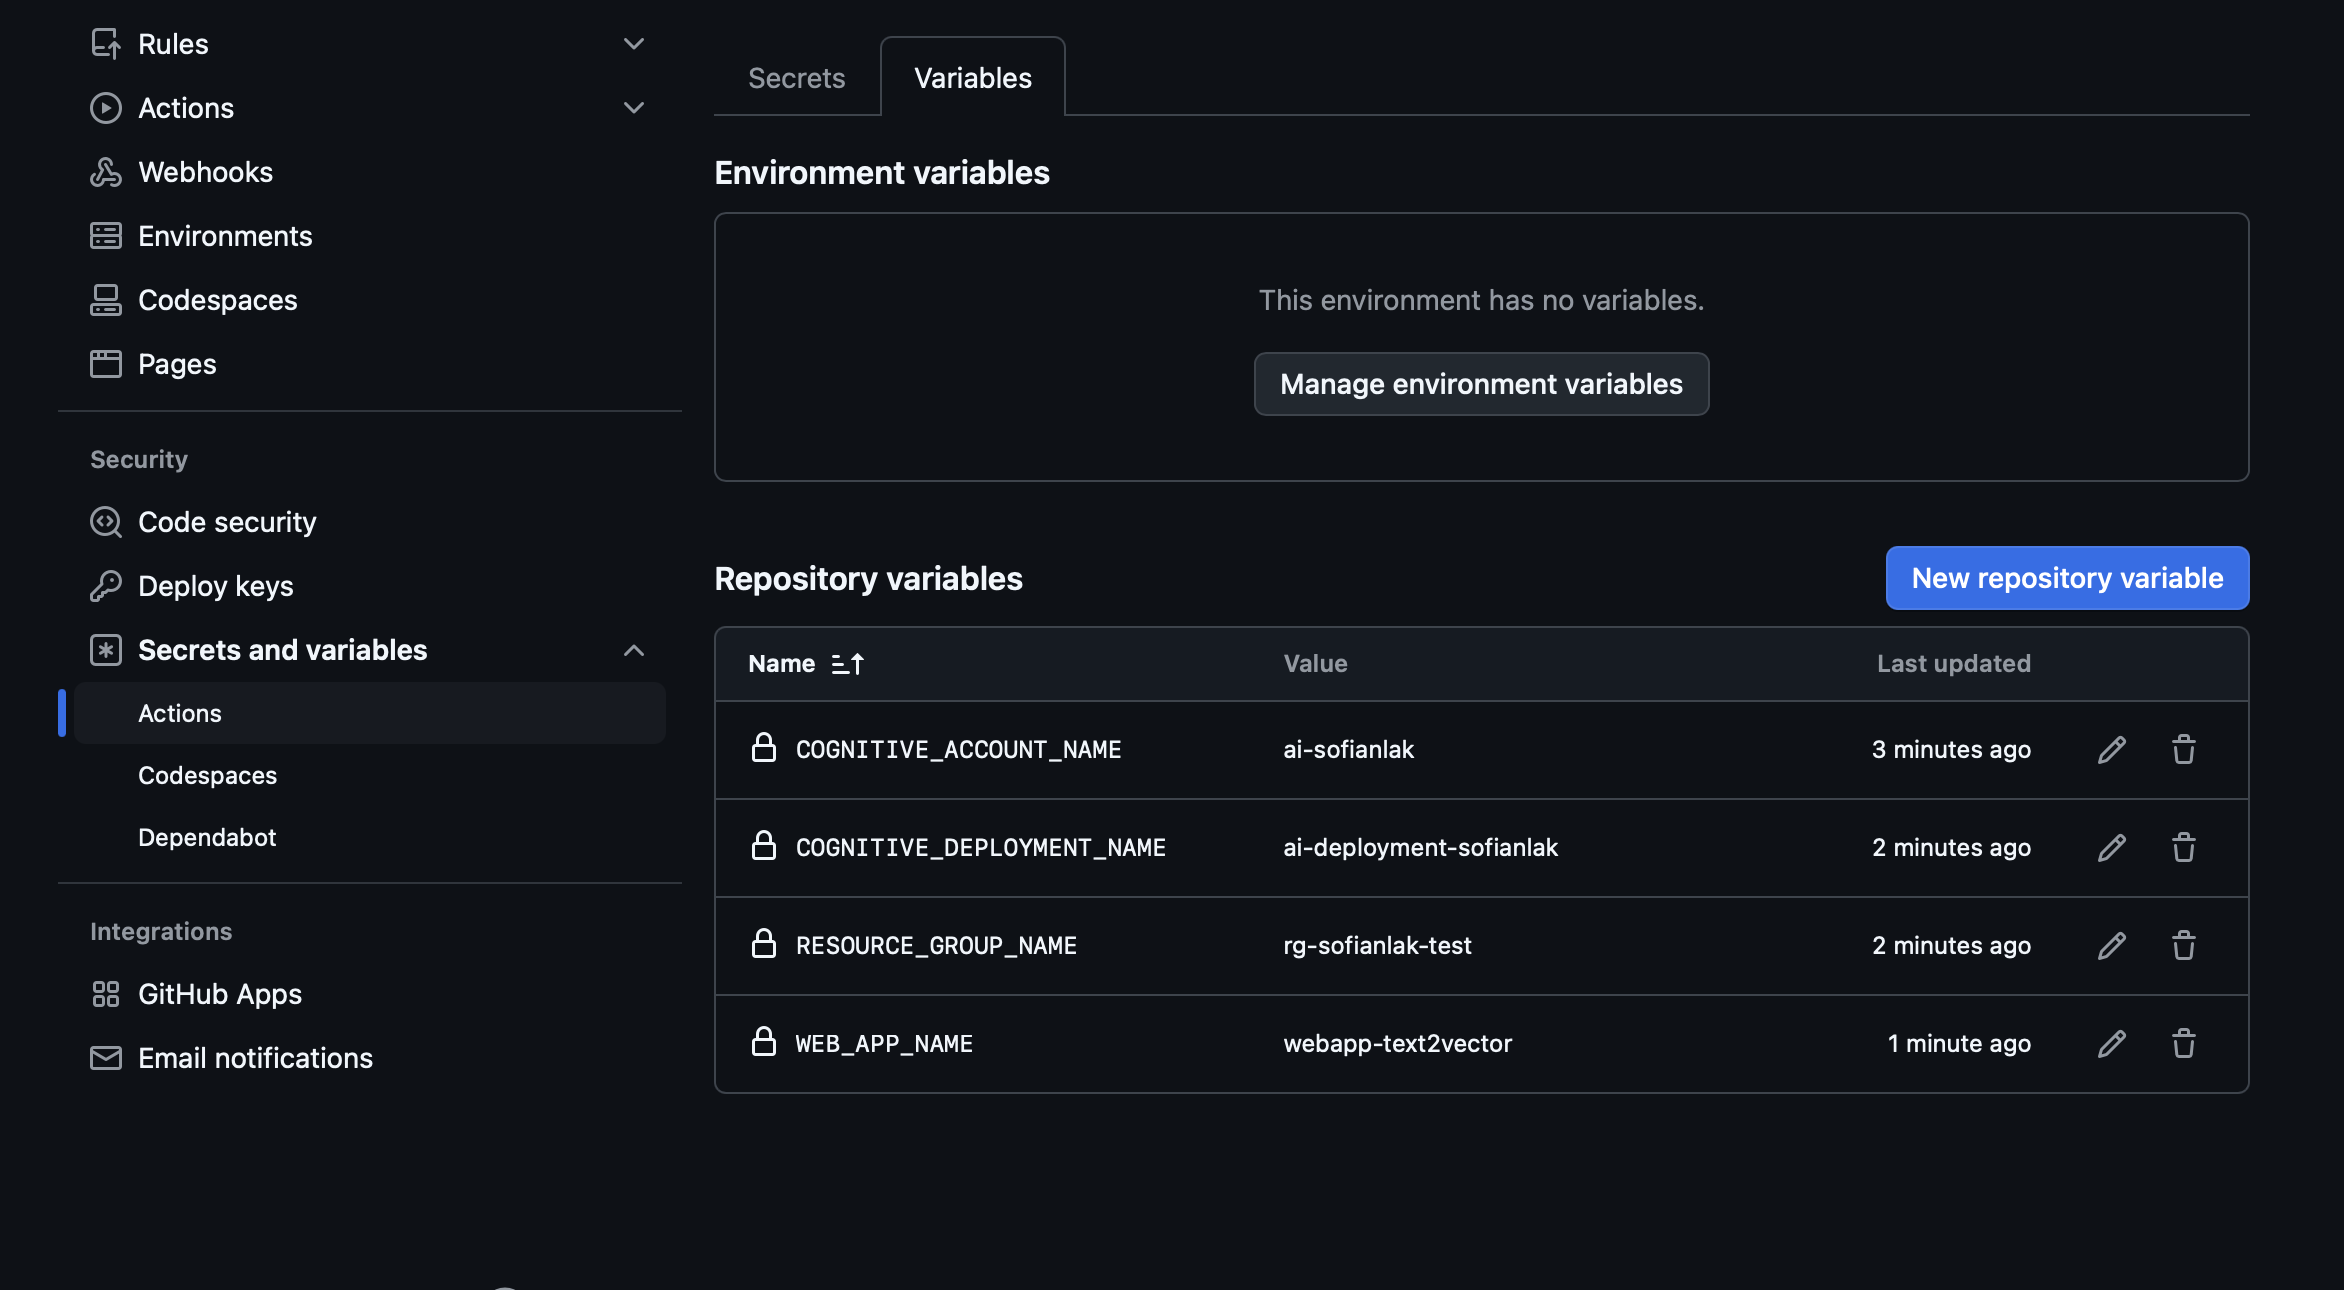
These secrets and variables are referenced in the GitHub Actions workflow (deploy.yml) under the env field.
- GitHub Secrets: We store Azure service principal credentials, Terraform Cloud tokens, and any other sensitive data in GitHub Secrets. These include:
ARM_CLIENT_ID: The Azure client ID for authentication.ARM_CLIENT_SECRET: The Azure client secret for authentication.ARM_SUBSCRIPTION_ID: The Azure subscription ID.ARM_TENANT_ID: The Azure tenant ID. -AZURE_WEBAPP_PUBLISH_PROFILE: The Azure Web App publish profile used to deploy the application to the Azure Web App service.TF_TOKEN_app_terraform_io: The Terraform Cloud token for accessing workspaces.
- GitHub Variables: Non-sensitive values, such as resource names, are stored in GitHub Variables, which can be set at the repository or organization level. These might include:
RESOURCE_GROUP_NAME: The name of the Azure resource group.COGNITIVE_ACCOUNT_NAME: The name of the Cognitive Services account.COGNITIVE_DEPLOYMENT_NAME: The name of the Cognitive Services deployment.WEB_APP_NAME: The name of the Azure Web App to deploy.
Terraform Cloud Secret Management
In addition to GitHub, we also need to securely store the Azure service principal credentials in Terraform Cloud to allow Terraform to interact with Azure and provision resources.
Go to your Workspace settings > Variables > Workspaces variables > Add variable (Environnement variable) then add the following variables :
ARM_CLIENT_IDARM_CLIENT_SECRETARM_SUBSCRIPTION_IDARM_TENANT_ID
App Service configuration
As mentioned earlier, the Azure App Service was not deployed using Terraform in this project. Before deploying your application, ensure the following configurations are in place:
Check the SCM Basic Publishing is turn ON
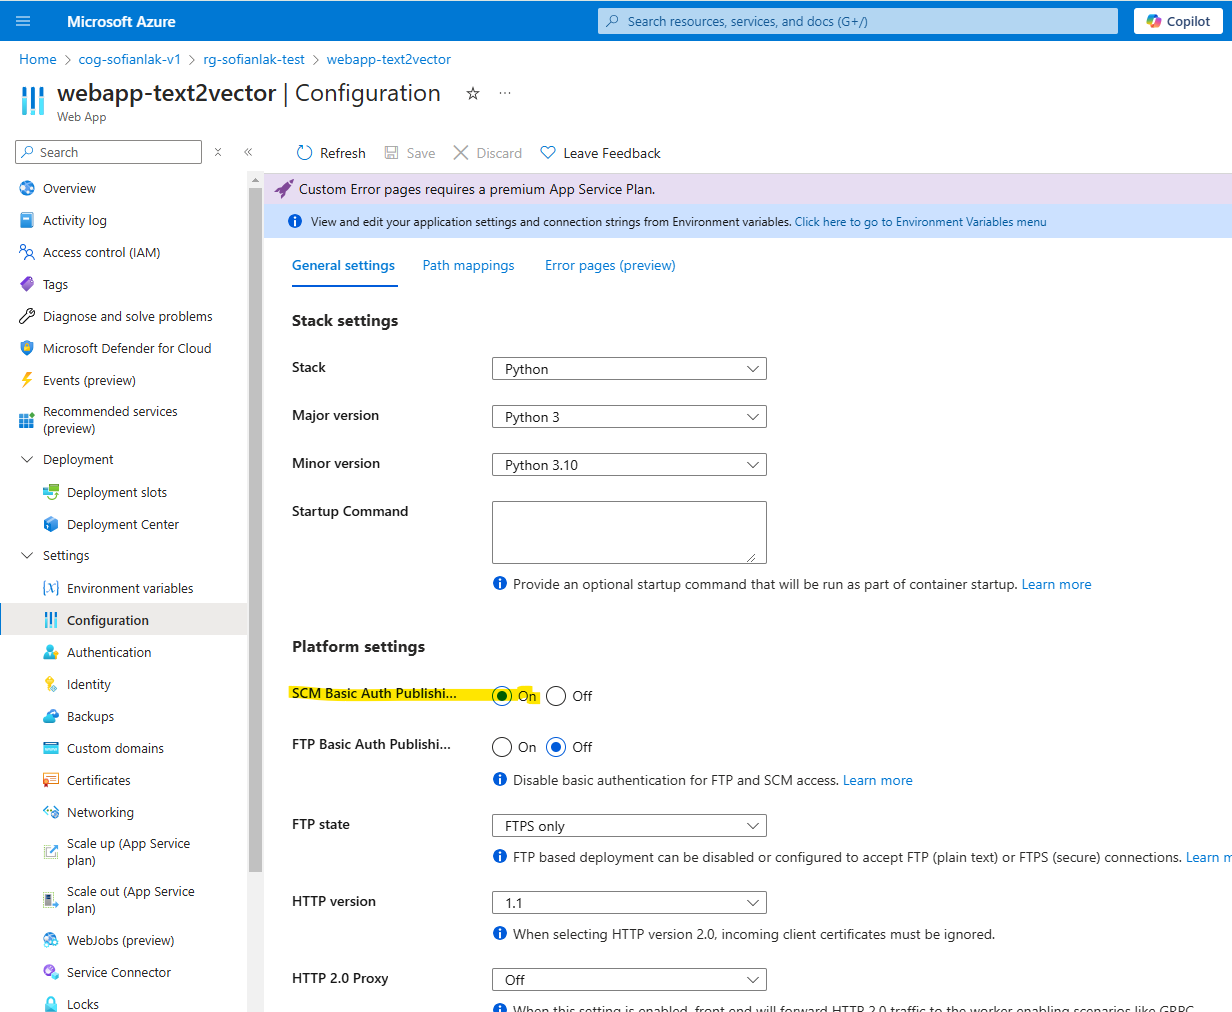 App Service: check configuration SCM
Download the publish profile
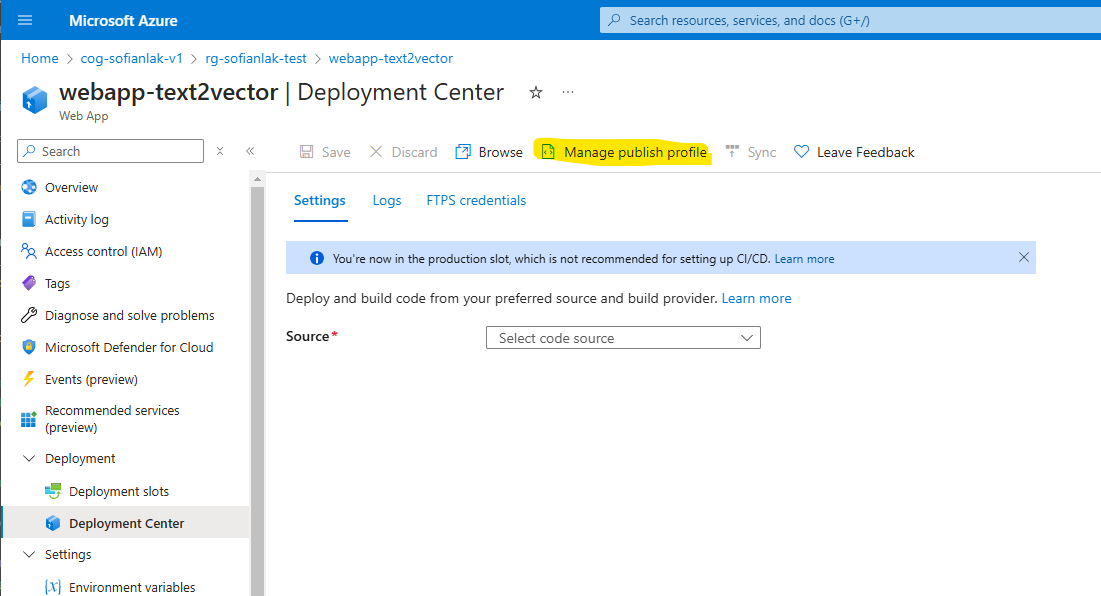 App Service: download the publish profile
Configure the environment variables
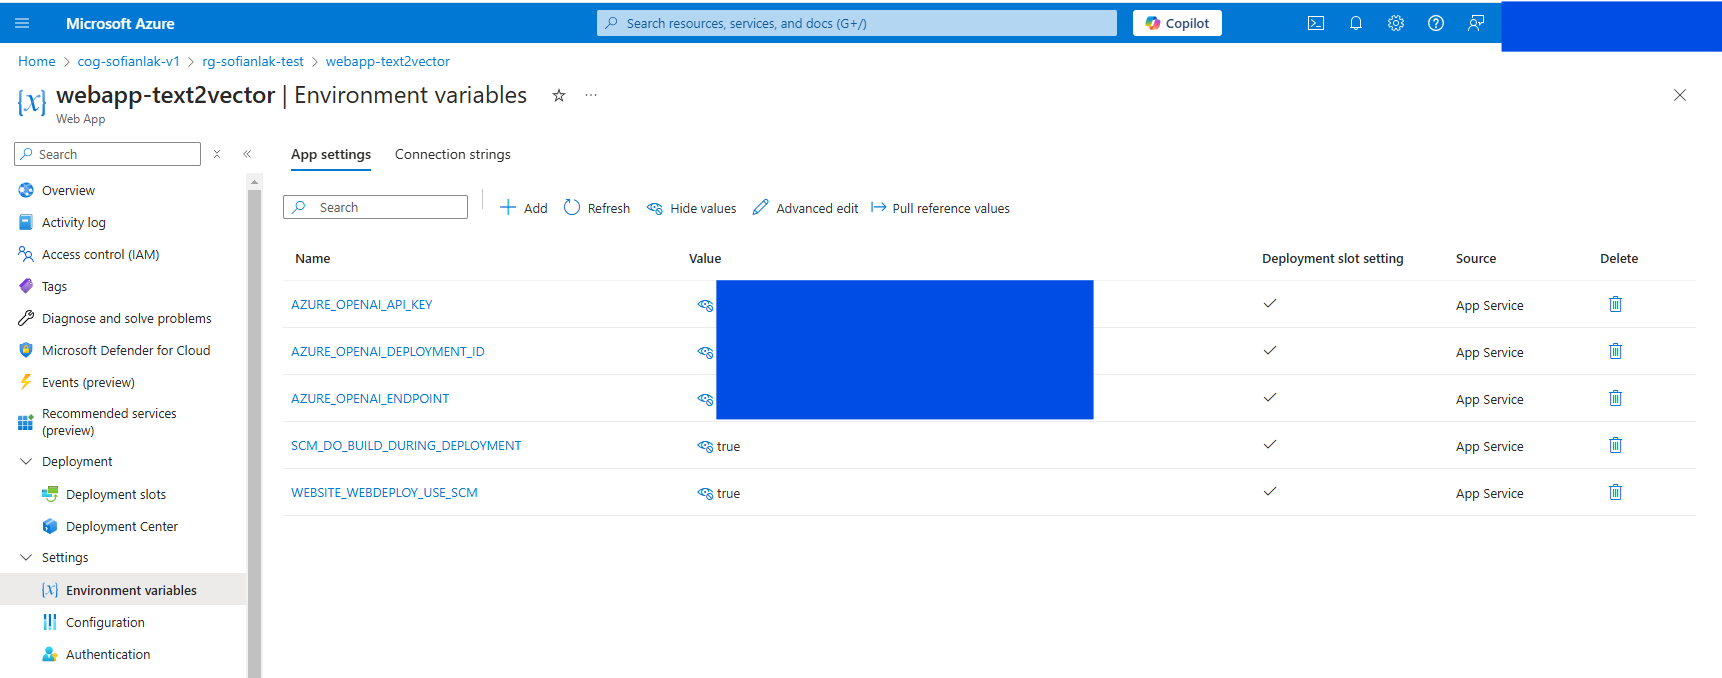 App Service: environment variables
Results
Verifying the Infrastructure
After committing our code to GitHub, GitHub Actions is triggered and automatically deploys our app to Azure. 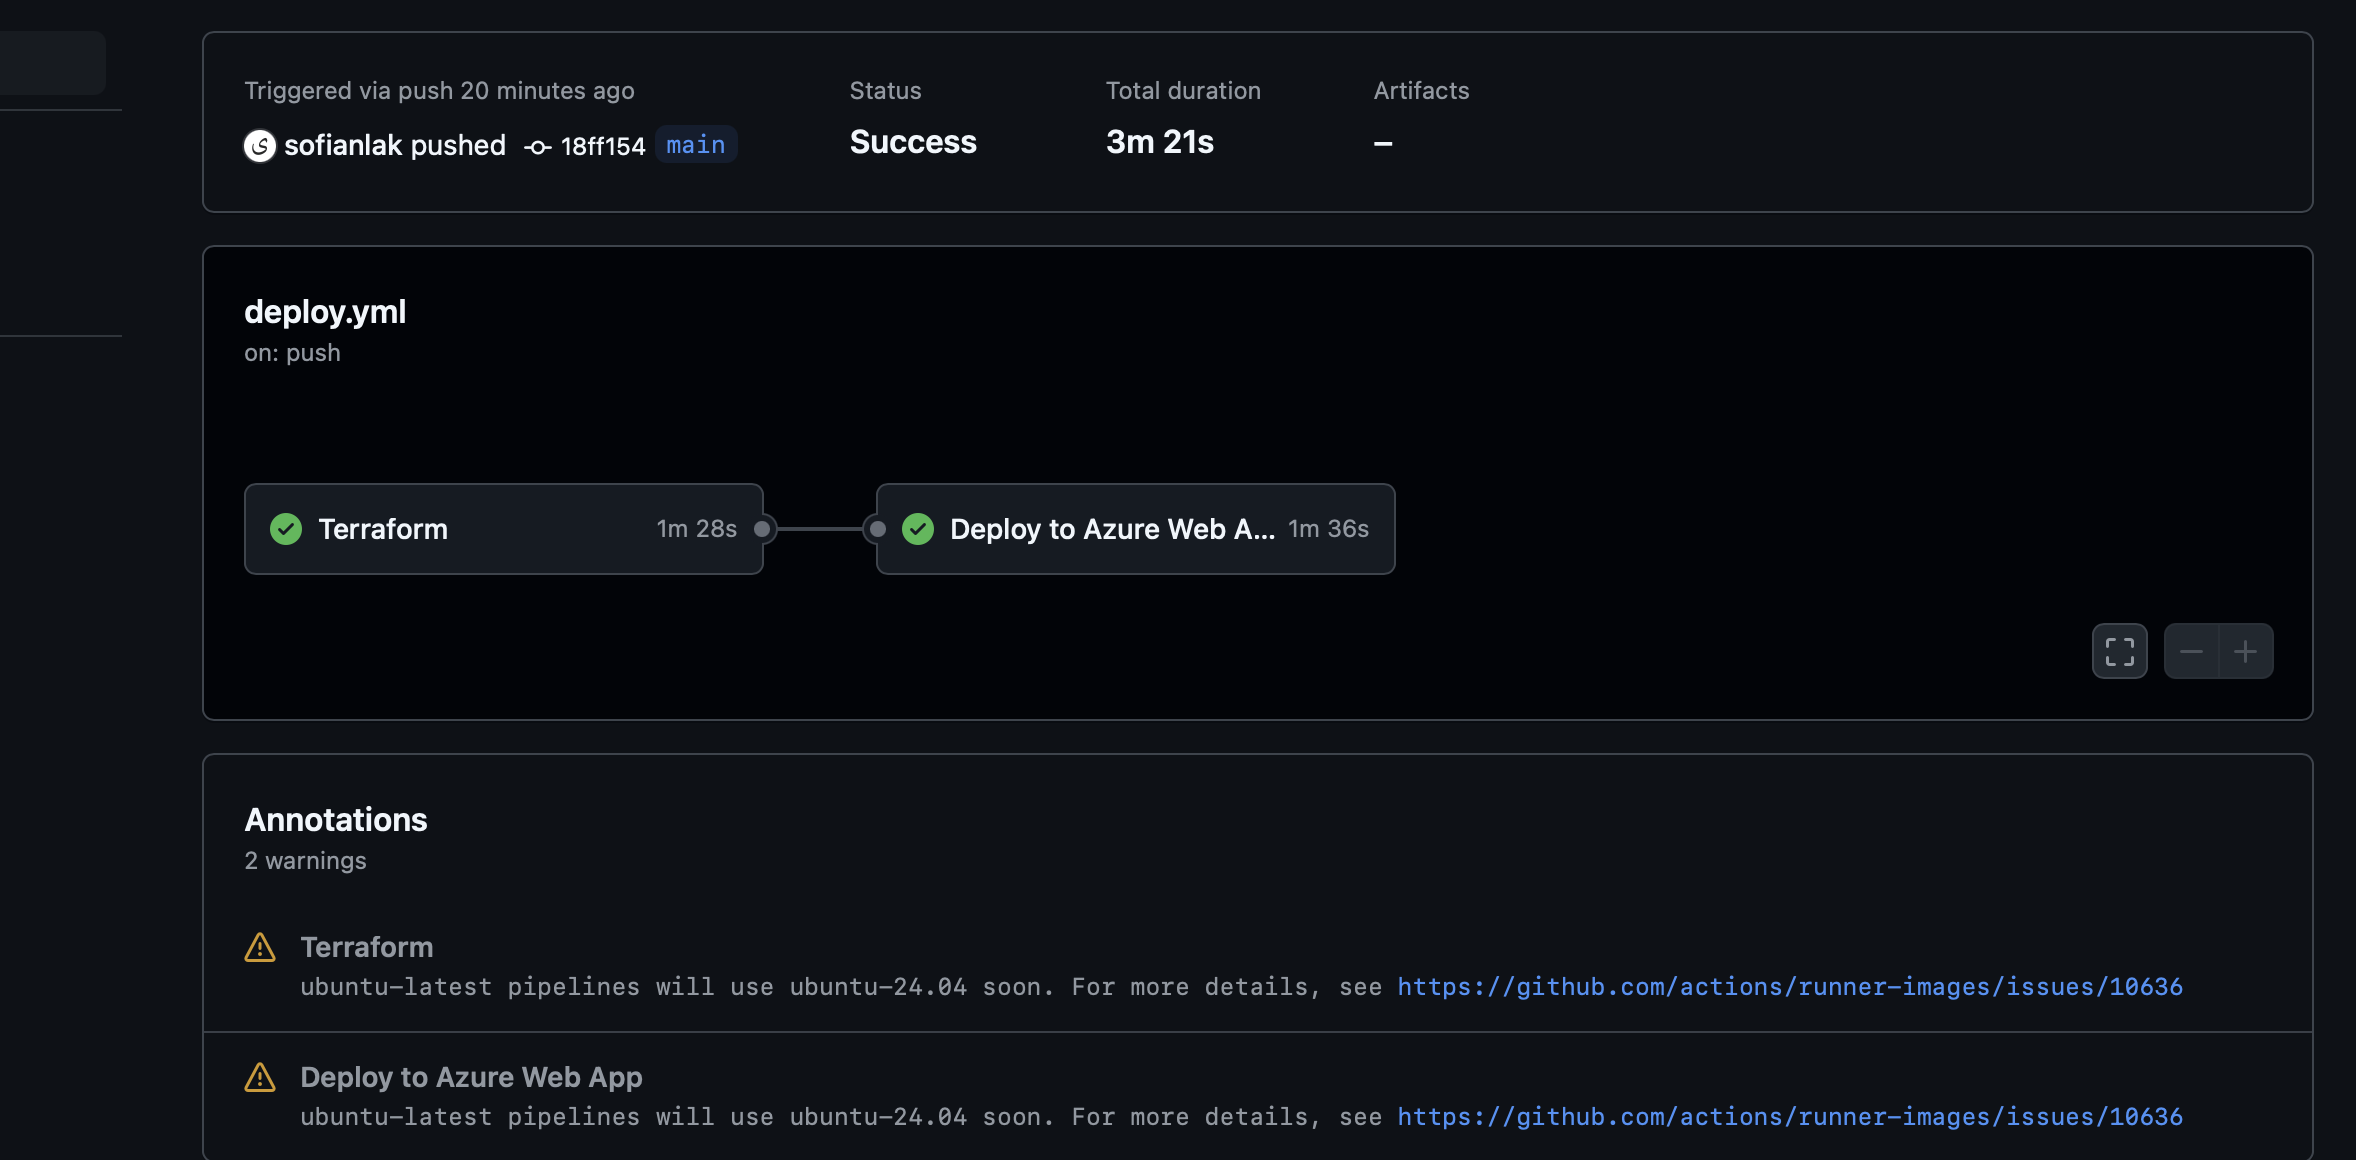 Azure resources deployed successfully
Within a few minutes, we can verify that our resources have been successfully deployed to Azure. 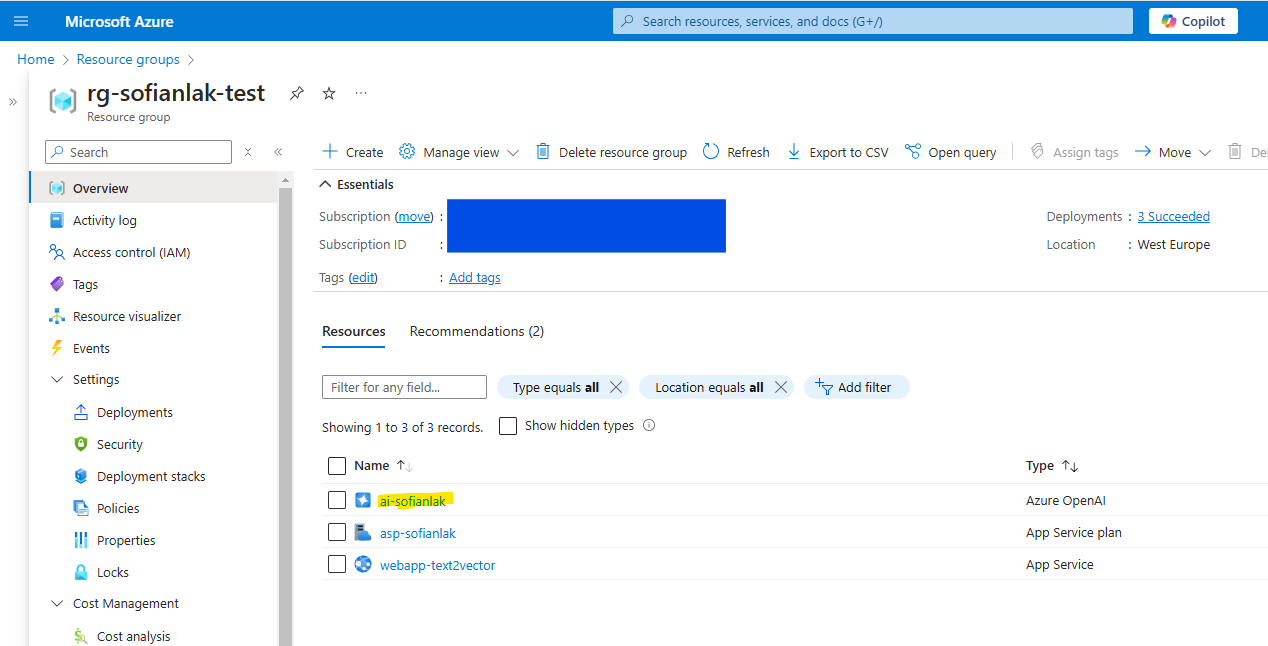 Azure resources deployed successfully
Here’s a view of our Azure Cognitive Services deployment. The text-embedding-ada-002 model is ready to be used by our application, hosted on App Service. 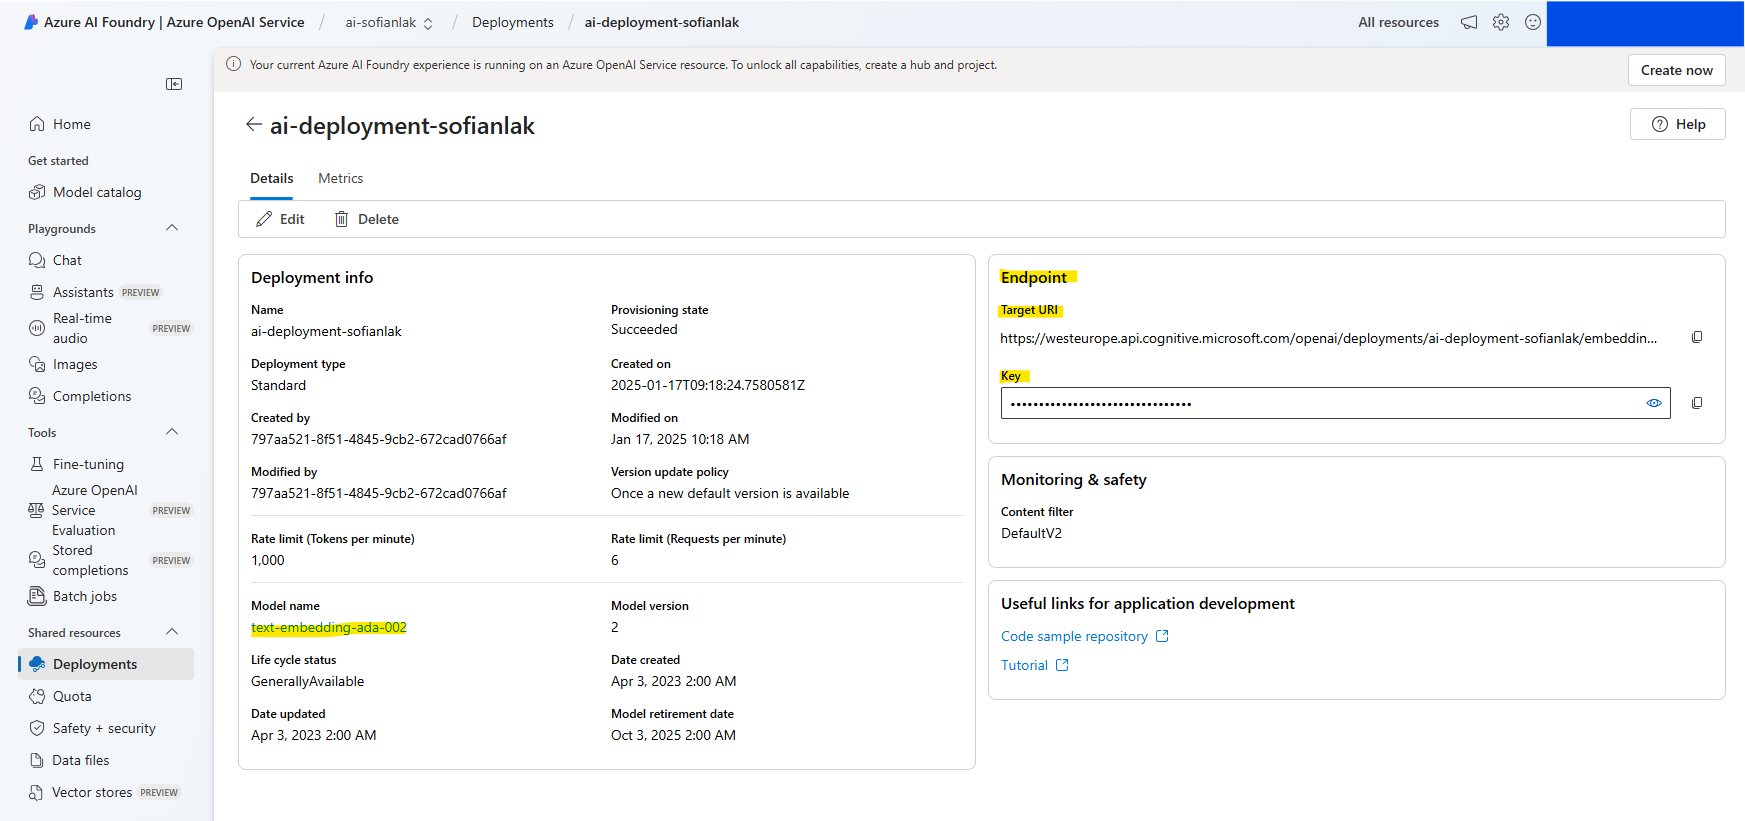 Azure AI Services: deployment OK
Testing the App
Here’s a look at our simple application. The URL is automatically generated when you create your App Service. 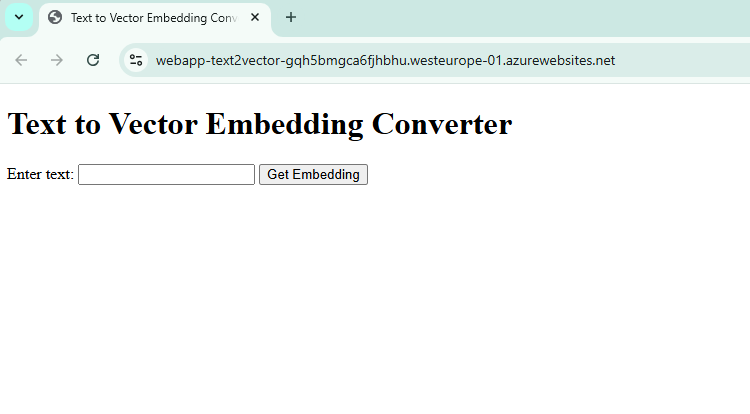 Text to Vector application hosted in App Service
When we input the word strawberry, the application successfully returns the following vector embeddings: 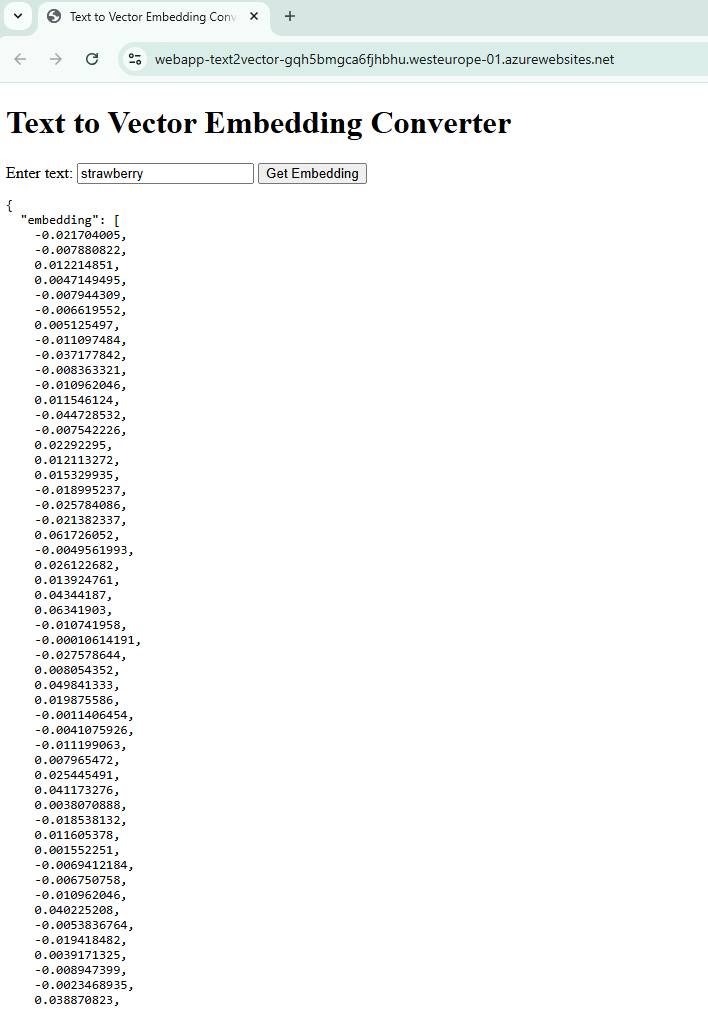 Vector embeddings of the word Strawberry
Next steps
- Store the embeddings in a Vector Database like Qdrant or a simple Azure PostgreSQL server
- Explore ways to optimize embedding retrieval for faster performance
- Extend the application with additional AI models or features
